
| 일 | 월 | 화 | 수 | 목 | 금 | 토 |
|---|---|---|---|---|---|---|
| 1 | ||||||
| 2 | 3 | 4 | 5 | 6 | 7 | 8 |
| 9 | 10 | 11 | 12 | 13 | 14 | 15 |
| 16 | 17 | 18 | 19 | 20 | 21 | 22 |
| 23 | 24 | 25 | 26 | 27 | 28 | 29 |
| 30 |
- 몇번째행
- Google Pay
- CSV
- php
- 업로드
- purchases
- google_purchases
- SQL
- 영수증검증
- 리눅스
- purchases_subscriptions
- how to slim install
- Google_Client
- closest
- 데이터베이스확인
- 테이블인덱스
- 영수증인증
- MySQL
- 아파치
- Google_Service_AndroidPublisher
- 데이터베이스 지정하기
- Database
- google purchases
- TABLE
- slim install
- 영수증확인
- meta
- 클릭이벤트막기
- subscriptionsv2
- Today
- Total
Web_developer
리눅스 Apache 2.4 설치 / CentOS 7 소스설치 본문
# Apache 란?
- 정적 파일의 웹서비스를 담당하는 웹서버를 말한다.
- Tomcat(WAS)도 자체적으로도 정적 파일 웹서비스 기능이 있으나 속도가 느리기 때문에 정적 파일만을 전문으로 서비스하는 Apache와 연동하여 역활을 분담하는 방식으로 주로 사용한다.
# Apache 설치 버전 : 2.4.27
# 다운로드 경로 : http://mirror.apache-kr.org/httpd
- 해당 링크에서 자신이 설치할 버전의 Apache 파일을 다운로드 받는다.
- 필자는 httpd-2.4.27.tar.gz 파일을 다운로드 받아 /usr/local/server 디렉토리를 생성하여 업로드 하였다.
1. 설치 전 필수 Library
yum -y install gcc-c++
yum -y install zlib-devel
yum -y install openssl-devel
yum -y install pcre-devel
yum -y install expat-devel
2. Apache 압축해제
cd /usr/local/server
tar zxvf httpd-2.4.27.tar.gz
1) 압축해제 시 아래와 같이 httpd-2.4.27 디렉토리가 생성된다.

3. Apache 설치
1) 설치 폴더 이동 및 사용권한 추가
cd httpd-2.4.27
2) 컴파일
./configure --prefix=/usr/local/server/apache --enable-mods-shared=all --enable-so --enable-rewrite --enable-proxy --enable-proxy-ajp --enable-proxy-balaner --enable-proxy-http --enable-proxy-connect --enable-ssl --with-included-apr3) ERROR
- 설치를 진행하던 중 2.2 버전 설치때에는 나오지 않았던 오류가 나왔다.
검색 결과 apache apr, apr-util 설치가 필요하다고 한다.
oxy-balaner --enable-proxy-http --enable-proxy-connect --enable-ssl --with-included-apr
checking for chosen layout... Apache
checking for working mkdir -p... yes
checking for grep that handles long lines and -e... /bin/grep
checking for egrep... /bin/grep -E
checking build system type... x86_64-pc-linux-gnu
checking host system type... x86_64-pc-linux-gnu
checking target system type... x86_64-pc-linux-gnu
configure:
configure: Configuring Apache Portable Runtime library...
configure:
configure: error: Bundled APR requested but not found at ./srclib/. Download and unpack the corresponding apr and apr-util packages to ./srclib/.
4) Apache apr 설치
- APR 다운로드 링크 : http://apache.mirror.cdnetworks.com/apr/
- 참고 링크 : http://jmchung.github.io/blog/2013/09/06/centos-installing-apache-portable-runtime-apr-for-tomcat/
① Apr 관련 소스를 다운로드 받아 /usr/local/server 디렉토리에 넣어둔다.
② tools 설치
yum groupinstall "Development Tools"③ apr 압축해제 및 httpd ->srclib 폴더 이동
tar -zxvf apr-1.6.2.tar.gz
tar -zxvf apr-util-1.6.0.tar.gz
mv apr-1.6.2 /usr/local/server/httpd-2.4.27/srclib/apr
mv apr-util-1.6.0 /usr/local/server/httpd-2.4.27/srclib/apr-util
5) 2. 내용중 2) 컴파일 다시 실행
- 컴파일이 완료되면 아래와 같은 화면이 나온다.
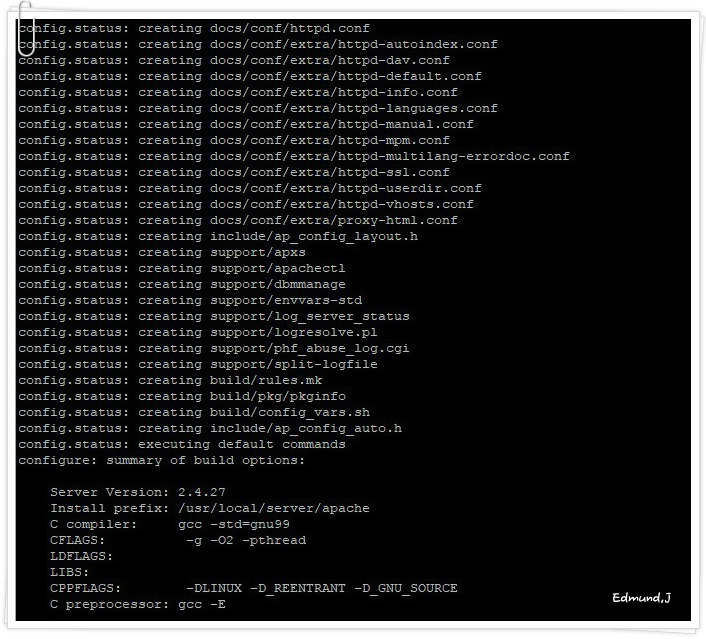
6) 오류없이 컴파일이 되었다면 아래 명령어로 설치를 완료한다.
make && make install7) 설치가 완료되면 /usr/local/server 경로에 apache 가 설치가 된다.

4. Apache 설정
1) ServerName 를 127.0.0.1 로 변경한다.

5. Apache 실행 테스트
1) apache 서버 시작
/usr/local/server/apache/bin/apachectl start- 실행 후 아이피를 브라우저 주소창에 넣어도 화면이 정상작동하지 않을 것이다.
- iptables 라는 방화벽에서 포트를 차단하여 사용할 포트를 추가 후 진행하는 방법 또는 iptables 서비스를 중지시키는 두가지 방법이 있다.
2) iptables 설정
- 아래 명령어를 입력 후 80포트를 이미지와 같이 추가해 준다.
centOS 7 부터는 iptables를 따로 설치를 해야한다.
아래 링크에서 확인하자
CentOS 7 에서 iptables 방화벽 데몬 사용하기
vi /etc/sysconfig/iptables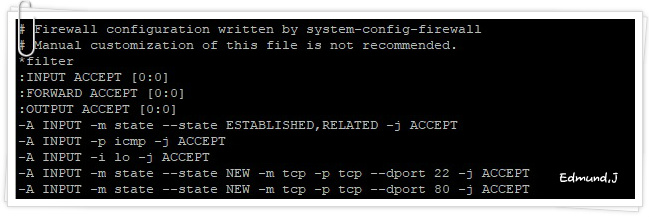
3) iptables 재시작
service iptables restart
6. 사이트 작동 확인
- 브라우저 주소창에 해당 서버 아이피 예) http://192.168.0.1 또는 https://localhost 과 같이 입력 후 아래의 화면이 나오는지 확인

7. Apache 서비스 등록 및 부팅시 자동실행
1) 서비스 등록
- 아래와 같이 입력하면 httpd 라는 서비스가 생성된다.
cd /usr/local/server/apache/bin    // Apache 설치 폴더 이동
cp apachectl /etc/init.d/httpd     // httpd 서비스 등록
service httpd restart              // 서비스 등록 완료 후 서비스명으로 재시작
2) 부팅시 자동실행 설정
vi /etc/init.d/httpd         // 적용 전 httpd 서비스 내용 추가

// 택스트 화면 상단에 아래 내용 추가
#!/bin/bash
#
# httpd        Startup script for the Apache HTTP Server
#
# chkconfig: 345 85 15
# description: Apache is a World Wide Web server.  It is used to serve \
#              HTML files and CGI.
# processname: httpd
3) 시작프로그램에 등록
chkconfig --add httpd
chkconfig httpd on
'Linux' 카테고리의 다른 글
| Node.js와 socket I/O의 실시간 채팅 구현하기 (0) | 2021.08.01 |
|---|---|
| centos7 - nginx + php + mariadb / yum 설치 (0) | 2019.08.23 |
| CentOS 7 에서 iptables 방화벽 데몬 사용하기 (0) | 2019.07.31 |
